Sunday, February 22, 2015

Mocha Ice Cream (Custard Style) Low Carb & Gluten Free

So another week under the belt under the new low-carb lifestyle and I can say it's going really well.  (9.4 lbs to-date, although it's much slower going this week).   I am now to the point where I forget or don't need to snack, and my hunger has more or less abated.  My snacking/sweet tooth is mostly there when I'm bored (so this is habit, not need), or after dinner.

At a dinner party earlier this week (where I brought my own dinner and dessert to make sure I was prepared), the hostess asked us, in honor of Lent, to name one thing we couldn't live without.  I couldn't decide between ice cream and coffee.  To be fair, I have been without ice cream now for 2 weeks, but I canNOT give up my coffee in the morning. So it got me thinking that it was time to dust off my recipe for Mocha Ice Cream.  I won't be able to eat it for a few days ((1) it takes a full day to make and (2) tomorrow night I have my BlueStem/Julep dinner that I've been planning for months and I will go off-plan for the meal without guilt.  But what that means is I need to be extra vigilant against extra calories and carbs this weekend and probably Monday-Tuesday, too, so I can recover and not undo all my good work, plus (3) the next couple of days is showing highs in the Teens -- gross.), but its Saturday and I'm home and have all the ingredients, so why not!?

This recipe is a custard style - which means it has tempered egg yolks - and it's meant to be churned in an ice cream machine.  So if you haven't already, put the basin in the freezer.  My favorite recipe is an adaption of Martha Stewart's Vanilla Custard Ice Cream Base.

Not pictured:  Instant Coffee Crystals - they're in the
measuring cup with the coffee.
Her recipe calls for 1 cup of Whole Milk and 1 1/2 cup Heavy Cream.  The idea here is that a little bit of non-fat liquid helps the ice cream freeze with the right soft texture.  Since I'm making coffee flavored ice cream base, I am using a half cup of coffee (leftover from this morning) and 2 cups of Heavy Cream.  I'm replacing her vanilla bean with a tablespoon of Bourbon - it adds a bit of Vanilla Flavor to give the custard the full flavor without carbs, but also helps the ice cream stay soft since the liquor doesn't freeze. I replaced the sugar 1-for-1 with Xylitol.  I use Xylo Sweet -- See my last post on the health benefits and origin of Xylitol. And then I added 1/3 cup of cocoa powdered (Unsweetened) for the chocolate.  And to make sure the coffee flavor comes through, I added a tablespoon of instant coffee crystals.

UL: Whisking the eggs, sugar and salt
UR:  Bringing Cream mix to temperature
Bottom:  Tempering the egg mixture
Ingredients  -- Serves 6  (about 4 oz each) - 1 serving is 415 calories and 4 net carbs.
  • 1/2 cup coffee
  • 1 tbsp instant coffee crystals
  • 2 cups heavy cream 
  • 1/3 cup Cocoa Powder (unsweetened)
  • 6 large egg yolks 
  • 3/4 cup Xylitol
  • 1/4 teaspoon coarse salt
  • 1 tbsp Bourbon 
Directions 
  1. Combine coffee, cocoa, coffee crystals and cream
  2. UL: Whisking the egg mixture
    UR: Prepping the ice bath
    LL: Checking for thickness (Done!)
    LR: Cooling off in ice bath

  3.  in a medium saucepan. Bring mixture to a simmer over medium-high heat, stirring occasionally; remove 
  4. from heat. 
  5. Whisk together egg yolks, Xylitol, and salt in a large bowl.
  6. Gradually whisk in half of dairy mixture. Pour egg-milk mixture back into pan and cook over medium heat, stirring constantly, until thick enough to coat the back of a spoon, 6 to 8 minutes. 
  7. While this is thickening, prepare your ice bath.
  8. Pour custard through a fine sieve into a bowl set in a larger bowl of ice water; Let cool, stirring occasionally.   
  9. Once cool, stir in the Bourbon.
  10. Cover and refrigerate until cold, at least 1 hour. (I put a piece of saran wrap down onto the custard to keep it from forming a skin or absorbing refrigerator odors. (Custard base can be refrigerated up to 2 days ahead.)
  11. Add to your ice cream machine and churn based on your machine's directions.
  12. Freeze at least an hour, but let it sit out about 15 minutes before serving.  It will become harder if you freeze longer, but always give it 15 minutes before serving to be easier to scoop, and allow the flavors to be at their best.
Saran prevents a skin
from forming in the fridge
Yummy Creamy Goodness Prepped for Freezer
Makes about 25 ounces

Saturday, February 14, 2015

Back from hiatus -- Chocolate Chip Cheesecake Cookies (Sugar-Free, Low-Carb)

Ok, back on this low-carb bandwagon after a very long hiatus wherein I gained back what I lost by eating ice cream at every opportunity.

I've been back for a week, and I'm down 7 lbs.  I know this is the first-week-effect and is mostly water weight, but I'll take it.  Its gratifying to see the scale move early in the process and it allows me to power-thru the carb withdrawals without losing steam.  I would have thought by now I would've done the keto flu thing - but either it happened abbreviated-ly late on Day 2 (had a terrible headache that went away when I drank some chicken broth), or I feel so generally poorly (and have gotten used to it) that I don't notice the difference.  Or the worst is yet to come.  I hope it's not the latter 2.

Garmin VivoSmart
To help kick-start the weightloss process, I splurged on a Garmin VivoSmart fitness tracker.  It combines the fitbit functions of step counting, calorie counting (based on steps), and sleep tracking, with a heart rate monitor (for use during exercise that may not track well as steps - like weight lifting or yoga or swimming), with some smart-phone bluetooth integrations that allow automatic syncing with the app, syncing to MyFitnessPal, and notifications (such as text messages, phone calls, FB messages, other alerts, etc.) that display right on the wristband.  It also has a touchscreen and comes with a countdown that buzzes my wrist if I've not walked 200 consecutive steps (about..) within the last hour and displays "move" to remind me to get up and move.   Other than yesterday, I've beat it's ever-growing step goal each day.  So I feel like that's a win.

Chocolate Chip Cheesecake Cookies (Sugar-Free/Low-Carb)
So to the food part: I'm back in the kitchen experimenting.  This weekend, for Valentine's day, I'm watching the almost-5-year old daughter of some friends of mine. The last time she stayed with me, we made Nestle Tollhouse cookies and she requested that this time we make cookies again.  So, to make sure we made something that I could have, to offset the sheer quantity of sugar she had yesterday at her school's valentine's day party, but still fulfill the cookie-making requirements, I did a massive search on the interwebs for the perfect sugar-free, low-carb, chocolate chip cookie.  The one I found on Temple of Adventure had loads of positive comments from folks who had tried them, so that's the one I determined we were going to make.  They turned out beautifully - and while the texture is not like a regular flour-based cookie - think somewhere between muffin and lofthouse, they taste AMAZING.

Now if you're not prepared to do sugar-free/carb-free baking, this is going to get expensive quickly, and you're going to have to probably find a specialty health-food or alternative-food store to find some of the ingredients unless you have the most massive and well-stocked grocery store.  I found almost all of these things at my local Hy-Vee (the really big one in Gladstone on Englewood), but I had to supplement by going to Green Acres market in Briarcliff.  About $60 later (phew!) I had all the ingredients (but no fear, the next time I make these, its only a few ingredients that I'll need and no specialty ingredients).


The recipe uses almond flour instead of regular flour.  Xanthan gum acts as the thickener and provides the chewyness that would be missing from not having any gluten in the flour.  But, Xylitol is the star ingredient here.  Xylitol allows the sweetness without the carbs, and because it's a sugar-alcohol instead of a sugar, it is slowly absorbed from the digestive tract, and does not cause rapid rises in blood glucose.  Therefore on most low-carb diets, sugar-alcohols like xylitol don't count towards net carbs.   Word to the concerned:  I thought Xylitol sounded like some kind of franken-food and I'm a little leery of putting unreal foods in my face so I did some homework. Turns out Xylitol is found naturally in a lot of fruits, vegetables and the bark of some trees and has some cool health benefits as an alternative to sugar.  From the Xylitol.com website:

Because it can’t be utilized by bacteria in the mouth (like sugar can), xylitol doesn’t promote tooth decay, so dentists and nutritionists alike encourage the use of xylitol due to its unique and clinically proven dental benefits.  In addition, the caloric impact of xylitol is typically about 40% lower than other carbohydrates, making it a healthy addition to any low-carb diet.

So without further ado, my version of this recipe:

Chocolate Chip Cheesecake Cookies (Sugar-Free, Low-Carb) 
Makes about 36 cookies (I made mine a bit big, so it only really made about 30.)

Ingredients:
  • 8 oz 1/3 fat Philadelphia cream cheese, softened 
  • 2 Tbsp salted butter, softened 
  • 1 Tbsp natural peanut butter, I used Woodstock Organic for the lowest net carbs. 
  • 1 cup xylitol – I used Xylo Sweet 
  • 1 tsp pure vanilla extract 
  • 3 large eggs 
  • 1/4 tsp course sea salt (I used unsalted butter, so I doubled this). 
  • 1/2 tsp Bob’s Red Mill xanthan gum 
  • 1 tsp baking powder 
  • 2/3 cup Bob’s Red Mill almond flour/meal 
  • 1 scoop (1/3 cup) vanilla whey protein powder (I used a packet from Jay Robb.) 
  • 1 bag (about 1.3 cups) Hershey’s sugar free chocolate chips 
Directions:
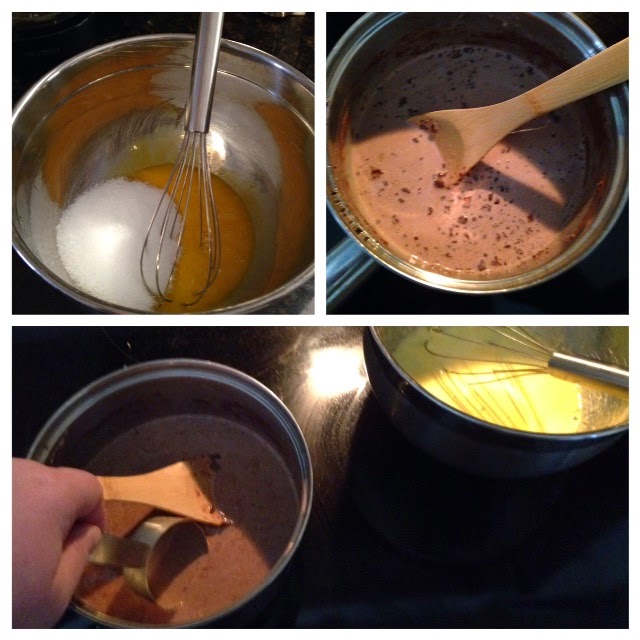
  1. Bring the cream cheese, butter and peanut butter to room temperature, and then whip them with a hand-mixer or stand mixer ‘til they’re well incorporated and a bit fluffy. 
  2. Once fluffy, beat in the extract and the xylitol. This is the baking equivalent of creaming the sugar. 
  3. Next step, add the eggs in and beat, one at a time. 
  4. In a separate bowl, mix together your dry ingredients – the salt, xantham gum (this makes the cookies chewy since we’re not using real wheat flour with gluten), baking powder, the almond flour and the whey protein. Be sure to use a fork or whisk to get rid of any lumps from the almond flour. 
  5. Add the dry ingredients in batches to the wet batter and mix thoroughly.
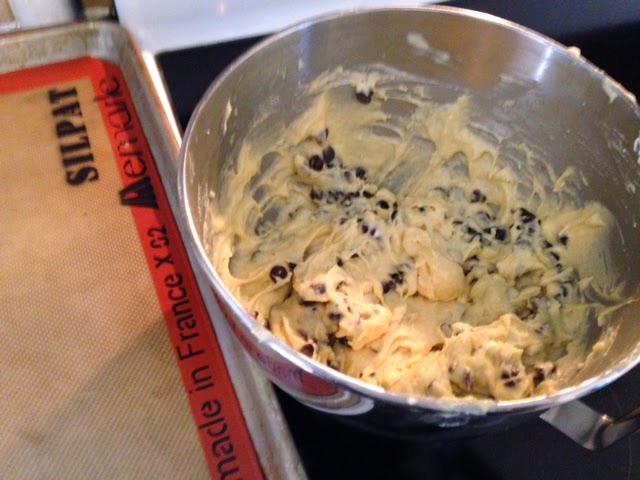
  6. Add the chocolate chips and mix well with a spoon. 
  7. Put the batter in the fridge for 10 minutes to firm up (for the proteins to start absorbing the wetness) while preheating the oven to 350.
  8. Line a baking sheet with silpat or parchment paper and work quickly to scoop out cookies.
  9. Bake 15 minutes til the edges get a bit crispy (they may not get real crispy on silpat). (Don’t worry the cookie will be very soft and chewy).  Again, I made my cookies a bit big, so they actually baked for 18 minutes. 
    You can kind've see the browning around the edges
  10. Let the cookies sit on the sheet for a few minutes before moving to a cooling rack.
  11. When you store, you’ll want to store in the fridge (cream cheese), and probably store with a sheet of wax or parchment paper between as they will stick together.
The nutrition for 1 cookie (if your batch makes 36): 97 calories, 1 net carb.


Sunday, May 4, 2014

Low-Carb Panang Curry

This week was crazy-busy.  I had either work or social functions every night. By the time Friday night rolled around, I wanted nothing more than to hide from the world.  A mindless escape book and a night on the couch was what I needed.  I ran my first 5k of the season yesterday.  Wow was I unprepared for that. I really need to train a bit more than I have been.  After another week where the only exercise I got was volleyball and a Saturday run, its become clear that I need to put forth a bit more effort.  (And for those playing along at home, end of week 3 and I'm down 9.4 lbs - so another about 2 lbs this week).

So, recommitting to fitness this week means (1) I have a few extra calories to burn on exercise days and (2) I have less time to prep meals in the evenings.  So as always, my favorite Sunday thing is to make something new for dinners during the week - so slightly higher calories and "easy" are called for.

I think next time, I'll just serve over the broccoli, rather 
than try to mix it in.  It made for a thick and messy looking
curry.  But oh! it tastes YUM.
This week's inspiration came from one of my coworkers, who brought in Thai for lunch on Friday from my local favorite, Lulu's Thai Noodle Shop, and it kicked in a craving for me.  Lulu's used to have the best Panang curry as an appetizer with a couple of chicken satay skewers, but it's not on the menu anymore.  I can still get it at Thai Place - which is phenomenal, but you have to order a full order, which comes with a lot of rice.  So, this weekend's project is to make some Panang curry, low-carb style.  Traditional Panang (also Phanaeng or penang) is fairly mild for a thai curry, and has bell pepper, coconut milk, a touch of lime and a touch of peanut.  I happen to have some panang curry paste - thanks to a pretty big Asian market down in the Rivermarket.  The ingredients themselves are pretty low carb, the only issue is the rice.  So, instead of serving on rice, I'm going to just make it really hearty by loading up broccoli and cauliflower into the sauce.

Ingredients:
Forgot the lime in the photo

  • 1.5 lbs chicken breast strips
  • 112 g green bell pepper (about 1 whole, sliced into strips)
  • 112 g red bell pepper (about 1 whole, sliced into strips)
  • 68 g white onion (about 1/2 of a very small onion, diced)
  • 2 tbsp olive oil
  • 2 tbsp Mae Ploy panang curry paste
  • 3 tbsp Peter Pan creamy peanut butter
  • 1 7/10 cup Taste of Thai Unsweetened Coconut Milk (1 can)
  • 12 oz Dole Broccoli & Cauliflower, raw
  • 1 tsp lime zest (zest of one small lime)


Directions:

Serves 3 very hearty (about 14 oz) servings, at 677 calories per serving, 53 g of protein, and 9 net carbs. See full nutrition at bottom of recipe.  You could stretch this to 4 servings for a bit lighter of a meal, which gets you to 508 calories, 7 g net carbs, and about a 10.5 oz serving.
  1. Cut the chicken strips into bite sized chunks, and sauté until browned in 1 tbsp olive oil on medium-high heat.  You may have to pour off a little liquid once it turns white to get it to brown, rather than just simmer/poach.
  2. While the chicken is cooking, steam the broccoli and cauliflower (I did the steam bag in the microwave for 4 minutes).
  3. When the chicken is browned, remove the chicken bits to a (clean) bowl and pour off any excess water
  4. Add 1/2 tbsp more olive oil to the skillet and sauté the bell peppers and onion until just soft, with just the littlest bit of browning.  Start off on medium-high heat, and then reduce to medium.  Remove those from the pan (add to bowl of chicken).
  5. Add 1/2 tbsp more olive oil to the pan, and add the curry paste to the skillet (pan should now be on medium heat), and stir a few minutes to kind've "toast" the paste, then add the peanut butter and stir til that mixes up.
  6. Add the can of coconut milk to the skillet and stir til the pastes dissolve into the coconut milk. This is kind've like breaking up lumps in a gravy, although the fats in both the milk and the paste make it break up pretty easily.
  7. Add all of the veggies and chicken back to the pan, stir so everything is coated, cover and reduce heat to its lowest setting for about 10 minutes (just long enough for the flavors to marry). 
  8. Zest your lime over the top and serve!

Sunday, April 27, 2014

Week-in-Review & Low-Carb Italian Meatloaf

Well, this week nearly kicked my butt with crazy work hours.  My only workouts this week were sand volleyball Sunday and Thursday, and a very quick interval run at the gym, yesterday. However I can report that as of today (end of week 2), I'm down 7.5 lbs.

We'd been having some very Spring-like weather - storming one day, warm and sunny the next (hey! The clover and dandelions are growing where grass should be!).  So, I spent way more than planned on a yard crew to prep my lawn - seeding and aerating, plus all the hoses and sprinklers and timers I bought to keep those seeds damp and happy in the yard, I decided that this weeks' meal plan needed to feature what I already had in my freezer/pantry to try to make up a few dollars.

I had bought ground beef and Italian sausage that I was going to make into a squash lasagna, but never did.  So I thought I'd instead make an italian themed meatloaf since it's half Italian pork sausage, and because I happened to have some Classico Tomato & Basil pasta sauce in the pantry.  I could have found a lower-carb pasta sauce (Hunts makes a no-sugar added one that's pretty low), but this has small enough quantities in it, and it's already pretty low (6 g net per 1/2 cup). Just know you could cut part of a carb per serving out by choosing a lower-carb sauce.  

So now that I have all that equipment to water the grass seed, of course it's now raining for the 4th day in a row.  But that means its a pretty good day to hide in the kitchen and cook. I'll be serving the meatloaf with a salad made from a mix of chard, kale and spring greens - just to make sure to offset this high-fat; high-protein entree and power up with some good antioxidants, and chard happens to have an antioxidant that helps to regulate blood sugar. Double-low-carb bonus!  (Nutrition for the meatloaf to the left).

Ingredients:

  • 1 lb 85/15 ground beef
  • 1 lb Italian pork sausage
  • 2 eggs, slightly beaten
  • 1 tbsp minced garlic
  • 60 g chopped yellow onion
  • 50 g chopped red bell pepper
  • 1/4 cup almond meal
  • 1/2 cup Classico tomato & basil pasta sauce (divided in 2)

Directions:
  1. Preheat oven to 350°
  2. Spray a loaf pan with non-stick spray,  or else line with easy-cleanup foil
  3. Mix all ingredients except 1/4 cup of the tomato sauce by hand - careful not to compact too much.
  4. Pat the loaf evenly into the pan, being careful not to compact too much
  5. Top with the remaining sauce
  6. Cover with foil and bake for 1 hour and 15 minutes
  7. Remove the foil, turn up the heat to 400° and bake another 15 minutes  - if you wanted to, it might be good to sprinkle on some grated parmesan just before you put it back in.  I wanted to, but was out :( 
  8. Ensure the internal temperature has reached at least 145° - it will continue to cook a bit after you take it out of the oven and will likely reach 150-155° or so. (I know FDA recommends ground beef to 160°, but in my opinion, any more on the meatloaf dries it out too much and overcooks it).  Let cool at least 15 minutes before trying so serve (be sure to pour off the fat that will have pooled up around the outside).
  9. Serves 6.


Saturday, April 19, 2014

Turtle (or Mud-Pie) Gluten-Free & Low Carb Cheesecake

Well, I made it through the first week of low-carbing.  I hit that "keto-flu" wall on Wednesday - major headache and achey body (although that may also have been attributed a little bit to my run on Monday and swim on Tuesday).  But, I felt better by Thursday - which was a good thing, because 2 hours of sand volleyball in the miserable cold was hard to take when I felt okay.. I can't imagine how bad it would have been had I been flu-y also.  So far, I'm down 4 lbs.  I love that mega first-week loss that comes with low-carbing as your body flushes the fluids your carbs have been holding onto.  I know this rate of weight loss won't last, but for my long-term motivation it's nice to start off on a high.

Tomorrow I'm going to an Easter lunch with the family of a good friend.  As I'm intending to keep low-carb, and my friend's dad is diabetic, I'm bringing a low-carb (Sugar-free) and also gluten-free cheesecake (recipe below).   They're serving smoked ham (which is nice instead of honey glazed), scalloped potatoes, brussels sprouts with pecans, deviled eggs and corn on the cob.  I'll skip the potatoes and the corn, but I should be able to keep low-carb with the rest.  Don't get me wrong, it'll be a high-calorie meal, but as long as I'm not rained out on volleyball tomorrow night, I'll more than burn it off.

low carb chocolate coffee caramel pecan cheesecake
You want this - chocolatey, coffee, caramel
and pecan cheesecake.  Low-carb (& gluten-free)
and 12 net carbs and 431 calories per serving.
Anyway - on to the recipe.  I've made a variation on this once before and it is YUM.  The only thing I'm really adding this time is a bit of caramel drizzle, since I found Walden Farms has one that is zero calories and zero carbs, and some coffee flavoring into the cheesecake.  So instead of this being just my chocolate swirl cheesecake, I'm calling it mudpie.  Although I guess it could be turtle too. Using the pecans in the crust (this is my recipe crust when I make key lime pie too, but I haven't attempted a low-carb one of those yet), makes sure this can be gluten-free.  Splenda in place of sugar, and some specific SF products that I've bought (the chocolate syrup and the caramel syrup) make sure I can keep it sugar-free.  This is going to be a high-calorie and rich cheesecake, so small portions are plenty - This serves 12 pieces.

Ingredients

Crust
  • 1 1/2 Cups pecans (6 oz)
  • 1 Tablespoons granular sugar substitute (sucralose), divided
  • 1/2 Teaspoon ground cinnamon
  • 2 Tablespoons unsalted butter, melted
Cheesecake
  • 3 packages (8 ounces each) cream cheese, softened (I used Philadelphia 1/3 fat neufchâtel)
  • 1 tub mascarpone cheese
  • 2/3 cup Splenda
  • ½ cup heavy cream
  • 1 teaspoon vanilla extract
  • 3 eggs, lightly beaten
  • 1 packet of instant coffee (I used Taster's choice)
  • ½ cup sugar free chocolate syrup (Hershey's makes one, but I used Best Choice)
Ganache on top
  • 6 ounces bittersweet 60% baking chocolate (I used Ghirardeli)
  • 1/3 cup heavy whipping cream
Garnish
  • Walden Farms sugar-free caramel syrup (Smucker's makes a SF one too, but it has more calories and a few carbs, and the texture is probably a bit thicker).
  • A few toasted pecan halves
Directions
  1. Combine pecans, 1 tablespoon Splenda and cinnamon in a food processor. Process until finely ground. Toss with butter; press onto bottom of a 9-inch spring-form pan, with foil on the outside of the pan to ensure that the seam is covered. Bake until golden and set, 8 to 10 minutes. Cool completely on a wire rack. 
    This part of the process smells incredible.
  2. In a large bowl, beat cream cheese, mascarpone and Splenda until smooth. Beat in heavy cream instant coffee and vanilla. Add eggs; beat on low speed just until combined.
  3. Split ½ batter into another bowl.  In the mixer bowl, add ½ cup chocolate syrup and beat until combined.
  4. Add the coffee mix to the bottom of the spring form pan in dollops, then add dollups of the chocolate-coffee mix in between and on top.  Spread the top layer to ensure it's an even thickness, and then drag a knife in a swirl pattern to swirl the flavors.
  5. Bake at 325° for 65-75 minutes, set into a water filled jelly roll pan (but staying below the height of the foil, until center is just set and top appears dull. Cool on a wire rack for 10 minutes. Carefully run a knife around edge of pan to loosen; cool 1 hour longer. 
    Too bad you can't see the swirls
  6. For topping, place chocolate in a small bowl. In a small saucepan, bring cream just to a boil. Pour over chocolate; whisk until smooth. Cool slightly. Spread over top of cheesecake and add toasted pecans before the ganache layer sets. Refrigerate over night.   
    The ganache will dull a bit when it's cooled,
    and this will look much better once it's out of the pan.
  7. Drizzle with sugar-free caramel syrup before serving.  

Monday, April 14, 2014

Beating the Blerch


As I mentioned in my First Post, I've signed up to go to Seattle and run the Beat the Blerch 10k in September with one of my girlfriends.  To say that I'm an aspiring runner would imply that I enjoy running or look forward to it, but notsomuch.  Mostly I just aspire to want to run.  The Oatmeal (aka Matthew Inman) wrote a comic blog post, and later a book about running, wherein he describes the Blerch as


"a fat little cherub who follows me when I run.  He is a wretched, lazy beast.  He tells me to slow down, to walk, to quit. "Blerch" is the sound food makes when its squeezed from a tube."Blerch" is the shape of my tummy after a huge meal.  If I am sedentary at a time when I have zero excuse for being sedentary, I call this "Blerching."  The Blerch represents all forms of gluttony, apathy, and indifference that plague my life. "
So I can get behind a run that is all about beating that feeling.  I actually ran tonight for the first time in forever - probably about a year.  And by run, I mean I put the treadmill at a 0 incline and dance/wobbled to a very slow 2.7/3.7 at first and then 3/4 mph interval pace.  But I did it, and I burned about 400 calories in the process.  If I can just do that 3 days a week for the next 3 weeks, I'll be able to finish a 5k in under an hour.  Woot.  Yeah, so I signed up for the Corporate Challenge 5k about 5 weeks ago, thinking that it'd be perfect - I'd have trained my 8 weeks and I'd be ready to RUN THE WHOLE THING.  Except: the Blerch and my allergies and some travel and some other Blerchy excuses. I'm going to pay for that apathy come May 3, but at least I finally started.  By Father's Day, I ought to be ready to run a real one.  Then I'm going to try to run one a month until the 10k and see if I can actually get to a point where I'm really running - not that "wog" thing I do. (walk-jog).  That's the plan anyway.  As long as I do something every day to beat the Blerch, it'll be successful though.

Sunday, April 13, 2014

"White" Chicken & Spinach Lasagna Recipe

So jumping back on the low-carb bandwagon, I made a low-carb lasagna; substituting the zucchini for the pasta noodles and leaving out the tomato sauce.  This will give me 4 very hearty dinners this week - which I'm a huge fan of.


Not very diet-y, but filling and one serving has
only 14g net carbs, 73g protein, and 679 calories
The key to this is slicing the zucchini into strips that approximate the lasagna noodles, and then baking them to soften them up before putting them into the dish.
Slice zucchini to "noodle" thickness, and season and pre-bake

This dish is super cheesey, and very high in protein, thanks to almost an entire rotisserie chicken.


This lasagna has no tomato sauce and becomes low-carb
when substituting the zucchini for the noodles

Low-carb White Chicken Lasagna (Serves 4)

Ingredients
  • 1 ½ large zucchini (about 1 lb sliced into long, thin strips)
  • grapeseed oil spray (or other spray oil)
  • ½ tsp lite salt
  • ½ tsp fresh cracked pepper
  • 1 tbsp Italian seasoning
  • 12 oz package frozen spinach, thawed and drained
  • 18 oz chopped skinless roasted chicken (I deboned one smallish rotisserie)
  • 8 oz shredded part-skim mozzarella (finely shredded)
  • 15 oz tub of part-skim ricotta
  • 45 g shredded Parmesan
  • 1 large egg
  • 15 g unsalted butter
  • 4 oz yellow onion, chopped
  • 13 g minced garlic

Directions
  1. Preheat the oven to 350°
  2. Slice zucchini into long horizontal strips to resemble lasagna noodles. They should be thin, but still have some weight to them. Spray a lined baking sheet with foil with the grapeseed oil – just enough to keep the zucchini from sticking. Lay out the strips on the sheet and spray the tops with grapeseed oil and season with salt and pepper. Bake for 12 minutes, then flip the strips over, re-spray, season the new side, and bake for 8 minutes.
  3. Mix together the ricotta, the egg, the Italian seasoning, the parmesan, and 1 handful of the mozzarella
  4. Mix together the chopped up chicken and spinach.
  5. Sauté the onions in butter until they turn translucent, add the garlic and sauté a few more minutes.
  6. Assemble with 1/3 zucchini on the bottom of the dish, ½ of the chicken & spinach mixture next; then ½ of the sautéed onions and garlic, then ½ of the ricotta mixture, repeat with another layer of everything.  Top with the last 1/3 of the zucchini and then cover with remaining mozzarella.
  7. Cover with foil and bake for 55 minutes.  Remove the foil and let bake another 15 minutes.  Let cool for about 15 minutes before cutting and serving.